Tag Archives: mineral eye shadow
Blending Eye Colors
Blending
What is it? Blending is the art of mixing different colors (whether still similar in hue or on completely opposite sides of the color wheel) to create a gradient of color, not a muddying mess that obliterates the vibrancy and trueness of the individual colors used to create a particular look.
Why bother? Using a single wash of color can be perfect or even ideal for some situations, like running out the door to make a few errands or for a simple workday, but in general, people who utilize makeup want to use more than one color, and of course, there are several good reasons behind this. Using multiple colors creates a sense of depth and dimension to the eyes, especially when used correctly. A darker color in the crease gives the appearance of a deeper, more pronounced crease; just as darkening the outer portion of the lid often defines the natural eye shape. By contrasting this dark shadow with a lighter color, the artist will open up their eyes while still allowing for an emphasis on accenting the shape of their eyes.
What do I need? I always find that telling makeup beginners that the easiest place to begin learning how to blend and understanding what exactly you are attempting to accomplish is to use similar colors. Using two drastically different colors is not nearly as easy as taking a dark brown and a medium brown or even a dark olive green and a lighter green. I also recommend choosing browns to start with, because you simply cannot muddy up browns, as they are already brown! The texture of the shadows and the type of base you choose can also simplify or complicate the process. Smoother textures will be easier to blend compared to chalky or matte ones. By MAC, some of the easiest shadows to work with are the ones with the best color payoff, and include many of the veluxe and veluxe pearl shadows. Lustre finishes are less color payoff as a whole and tend to be more prone to flake because of the chunkier texture of the shadow itself. Shadows like Antiqued or Woodwinked are definitely recommended. A way you can tell if a particular shadow will work is to swatch both on the back of your hand and test-run it. Fingers are great to blend with, but we will get into why you should not use them for your eyes shortly. Putting the shadow on the back of your hand and seeing how easily the two colors blend together will be a good indicator of how well they will blend on your eyes with a brush. Brushes are absolutely essential to applying eye makeup, and I cannot stress the importance of using brushes over fingers or sponge-tip applicators. Wrinkles are caused by pulling and stressing the skin out excessively, including merely pressure applied to the skin. As we get older, our skin loses elasticity, and in order to help you reduce your costs of wrinkle creams in the next ten, twenty, thirty years… brushes help correct some of the mistakes finger usage can make. Brushes will put less pressure on your eyelids allowing for less pulling or stretching of the sensitive skin there. Sponge-tip applicators are better than fingers, but not nearly as beneficial as brushes can be. One of the worst parts of sponge applicators is that they waste a lot of product, even for face makeup. They complicate the blending process because of how much excess shadow is left on the sponge, so you generally have to go through several in order to use a cleaner slate each time. Brushes pick up less color during each swipe, and this allows for better precision to determine color strength and vibrancy, but also allow you to easily switch between a light pink color and a dark blue color. Sponge-tip applicators also are much less forgiving of any mistakes you might make, because of that high color amount they pick up. Blending is best accomplished by a brush because the bristles allow colors to be subtly entwined and meshed together. I will admit that sponge-tip applicators may be able to blend shadows together, but ultimately do not find that they are the best method to go about blending successfully, especially over the long-haul.
When choosing a brush to apply eyeshadow and blend the colors together, there is definitely a wide, and most overwhelming, variety of brushes to choose from. Some users prefer to have separate brushes for the initial shadow application and the actual blending process. Either is acceptable, but it is not impossible to have an all-in-one eye brush. It is important not to use a brush that is firm or stiff, because you want the bristles to have a bit of fluffiness to allow you to sweep easily horizontally, vertically, and angularly. For instance, I find that MAC’s 252 brush is too flat and firm to do much more than apply shadow. You want a brush more like MAC’s 239, which has a bit of fluffiness, but not excessively so like the 222. The shape of the brush should be dome-like or slightly angular, but I would suggest the dome shape as being the most versatile. It is also important to choose a brush with soft bristles, and softness is not something solely reserved for high-end or more expensive makeup brushes. Sonia Kashuk makes more affordable brushes and can be found at Target stores, and their softness is not compromised by their price. Even some craftstore paintbrushes work wonderfully in the absence of cosmetic brushes! You can see what brushes I have purchased and pictures of what a good blending brush would look like by referring to my brush post.
How can I do it? Many believe that blending is one of the more difficult techniques to master, but it is merely something that takes a degree of precision and the willingness to practice if it does not just come naturally or easily to the person. I admit that it is not always easily accomplished when working with certain colors or textures. Each makeup application allows me to practice my blending or fine-tune it, because blending is really an on-going technique. Tutorials are an excellent way to understand the basics and mechanisms behind blending, but practice truly makes perfect in this case.
You begin blending by first applying two colors or more on your eyelid. There are two methods to go about doing this: 1) you can apply each color and blend afterwards, or 2) you can apply one and then blend as you apply the second one. I would suggest following the first if you really do not know where to start, because it is a lot easier to understand the process with this method. With method one, after you have applied the two colors to your lid, you will want to take your brush and hold it just at the end of the lightest color so that your bristles are vertical to your eyelid. Generally speaking, it is easiest to blend by pulling the lightest color into the darker one. With your brush positioned correctly, you want to pull the brush gently from the edge of the lightest that meets the darker color and pull towards the darker one. You are taking the lighter color and lightening the darker color faintly, which will create a sort of gradient effect so colors gradually fade into other colors, instead of splotches or blocks of color where it is clear where each one begins/ends. You do not have to drag the lightest color all the way to the end of the darker one; the point is merely to soften the edge between them so that the color on your lid appears fluid, while still maintaining distinct colors. The second method still follows the same technique as the first one; the only difference is perhaps the application follows darkest to lightest, allowing the lightest always to be overlaid on the darkest.
The art of blending is based on a very simple technique, but it just takes familiarity with it in order to be comfortable practicing it. One trick to aid in application is to use an intermediary color between two colors. For example, if you were to blend red and yellow together, you would likely get, at the very least, a tinge of orange; if you have an orange shadow, you can place a touch of it between the two and it will make blending even easier. Colors that are drastically different need to be handled very carefully, and it is a good idea not to rush through. Blending light green and a dark, hot pink requires a bit of finesse. The blending has to be incredibly subtle because these two colors do not naturally fade into each other, and infact, may be one of the tougher combinations to blend together without muddying them up. To deal with this, it is best to bring just a hint of the green into the pink, and repeat the motions as necessary. It will be problematic if you assume you will get a perfect gradient with just these two colors; it is best to merely soften the edge between the two colors, but you are unlikely to find it looks as blended as a look that merely consists of light green and dark green. Also realize that between green and pink, there are several colors inbetween, and your lid does not have the space to bring out all of them easily, either.
If you decide to use a second brush for blending purposes, the technique is still the same, but the brush you use will most likely be fairly fluffy in nature. You will still place your brush similarly and be gently pulling the colors together, meshing them to create a form of a gradient. Fluffier brushes tend to pick up less color so they are more forgiving; one wrong tap or stroke will not necessarily ruin your makeup. For this reason, it might be helpful for those struggling to successfully blend.
What else? Blending is merely pulling one color into and over another, almost like a venn diagram has two individual circles that share an overlapping section in the middle. You can facilitate blending by choosing a good eyeshadow base, like Urban Decay Primer Potion, MAC’s Prep ‘n Prime Eye, or L’Oreal Decrease; these not only allow your eyeshadow to have staying power and prevent the color from fading, falling off, or creasing, but they will help make blending all that easier. It is important to note that expensive brushes, eyeshadows, or other tools are not essential or even necessary to blend well. It is more about the quality of the product than the price; if the drugstore variety works well, it is not worse than an equivalent higher-end brand. I must stress the significance of taking your time and not rushing through the process if you are not comfortable with it. Use what makes you comfortable, and do not be afraid to spend an hour in front of the mirror ensuring you are doing a good job in perfecting your look. Not everyone can do perfect makeup in twenty minutes, and even those who are able, were not so when they first began, either. Have fun with it; spend one night mixing your two favorite colors together and see what you come up with. Experiment, test out new ideas, and be creative as you learn what works, what does not, and how you can improve upon your skills as a makeup artist.
About NYX Eyeshadow Base
Maximize the intensity, longevity and unashamed brilliance of your eye shadow statements with our eye shadow primer pots. Each of the three NYX Eye Shadow Bases—for vibrant, pearl or neutral tones—creates a smooth canvas for color, increases its durability and prevents fallout.
Name: Eyeshadow Base in White Brand: NYX Size: 7g Price: $6.00
From NYX’s website: Apply eyeshadow base to lids, then apply eyeshadows and see the colors pop with vibrant and sparkling luster. Eyeshadow base grabs and firmly holds finely milled powder so the color in the pot is what ends up on your eyes.
What I liked: – improves the color payoff and intensity of eyeshadows – easy to apply – the price
What I didn’t like: – if you have oily lids, eyeshadows will still crease and fade after a few hours of wear – jar packaging
I’ve been wanting to try NYX Eyeshadow Bases (available in White, Pearl and Skintone) ever since they came out so when I started running low on primers I thought it was finally time to give one of them a go. Because I love my eyeshadows very vibrant, I opted for White. White bases, in fact, apart from making your lids ghastly after application lol, improve the color payoff of eyeshadows and really make the shades pop a lot more than any flesh-toned primers.
For this reason, NYX Eyeshadow Base in white might not be ideal for those that like subtle and natural looks, but if you want to improve the payoff of sheer eyeshadows or just make your colorful looks as bright as possible, then this base is worth considering.
In addition, I’m not too keen on the packaging. Yes, the little white jar looks pretty but having to dip your finger in the pot every time is not very hygienic. Make sure you always wash your hands well before applying this. Or, especially if you have long nails, just use an eyeshadow brush instead.
Available at: Ulta.com and Amazon.com
Summary NYX Eyeshadow Base in White is a tacky, easy to spread white base that improves the color payoff of eyeshadows but won’t prevent them from creasing or fading. So if you have oily lids, a good primer underneath it is necessary. Also, the jar packaging isn’t hygienic but the price is quite cheap.
Primers come and go out of my life but Urban Decay Primer Potion remains my main man. Nothing like it. It locks eyeshadow on for extreme wear ALL damn day! Loves!
But of course, as any good blogger and makeup junkie, I dabble with other primers but I always come back to my beloved UDPP.
My latest venture in eye primer land is the NYX HD Eye Shadow Primer. Brand new to NYX this is a high performance primer that evens out skin tone, smooths out lines, preps, primes, holds shadows in place, and walks the dog…I lied about the last part.
What is it?
A new HD eyeshadow primer from NYX to lock shadow into place and created a flawless appearance!
This is great. Can’t afford UDPP? Get this. $7 bucks snags you a 0.28 oz bottle versus Urban Decay’s price of 0.34 at $18. Sweet eh? Nice little savings for penny pinchers.
Formula? Awesome. Basically a lightweight version of Urban Decay’s Primer Potion that seals eyeshadow in place and holds it all day. Granted, the entire evens out skin tone definitely does not ring true hear as the primer is a soft shade of beige, same as UDPP’s color, that applies and blends out transparent but in regards to keeping shadow in place? No question, DONE!
This comes in a tube with a sponge tip applicator. Pretty much a lightweight formula that you can slide across lids, blend out, and apply shadow on top. No drama, no fuss. Very simple to use. There isn’t alot of bells and whistles going on here, it simply does what it says it does and that would be hold shadows in place for endless hours of wear!
My Thoughts….
I have no complaints here. This just does the trick and does it well. I was impressed as I always feel like I pre-judge eye primers since I’m already so in love with UDPP which gets the job for me so why switch? But at half the cost you can probably be tempted here!
Works great, keeps my shadow in place, it is what it is?
Golden Pigment Eye Shadow By: e.l.f.
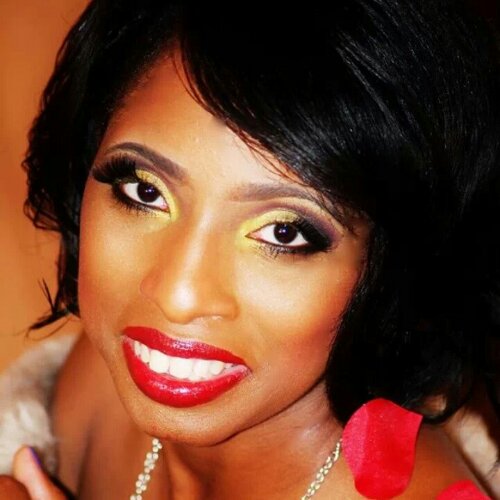
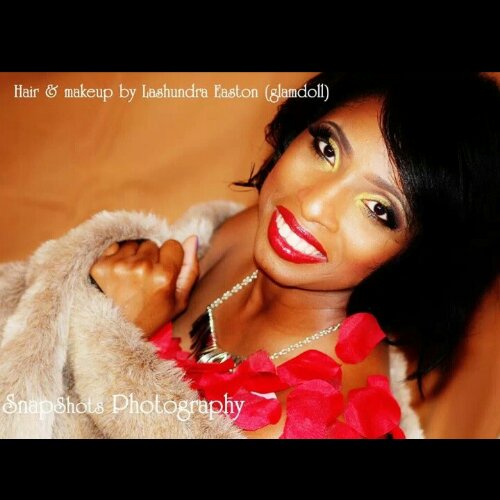
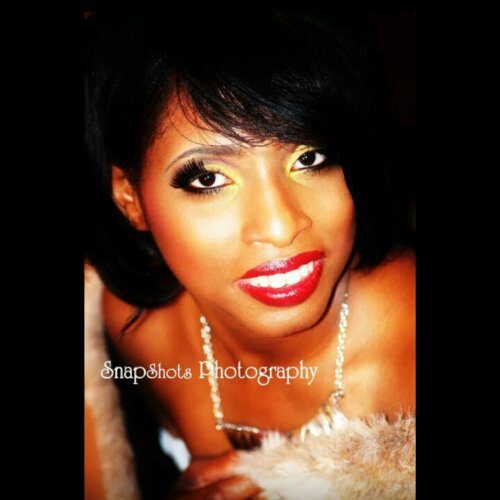
Let’s talk about how smooth and beautiful e.l.f. Mineral Eyeshadow Golden. I think the gold color is so warm with deep pigment! It instantly adds a special look on my clients eyes that you’re going to enjoy.
Not only that, it’s also versatile. I’ve used it on the lid as the main color, as well as on the crease, underneath the brow, on lower lash line. However, you decide to wear it, it will give your eyes a sexy look!!! It’s one of the good eggs of the elf Mineral Eyeshadow collection.
Read below….
√
- Soft, translucent shade
?
- Minimize the appearance of fine lines
√
- Easy to apply
√
- Easy to blend
√
- Can be applied wet
Key Notes
- Name: e.l.f. Mineral Eyeshadow Golden
- Amount: 0.03 oz.
- What I Paid: $1.50 US (was on sale; retails for $3 US)
- Price Per Unit: $50/oz.
- Other Colors Available: Elegant, Celebrity, Sweet, Mysterious, Earthy, Wild, Temptress, Confident, Sassy, Glamorous, Seductive, Natural, Innocent, Enchanting, Partier, Caffeinated, Girly, Socialite, Royal, Angelic, Trendy, Outdoorsy, Dreamy, Beachy, Smoldering, Flirty
- Where to Buy: e.l.f. website
elf Golden Mineral Eyeshadow Review
If you’re interested in a golden shimmery shade, I definitely recommend elf Golden Mineral Eyeshadow. Don’t be fooled by the swatches on the elf website. They’re not accurate; it looks much yellower there than it really is. The actual shade is a gorgeous gold with a teeny bit of antiqued bronze to it. It doesn’t have an obnoxious orangey tone to it like other gold shadows either.
Now the shimmer. Wowzer. In some light, you can see a bit of a green shimmer, but the green isn’t noticeable at all unless you look really hard. Even still, e.l.f. Golden Mineral Eyshadow makes my eyes subtlety glisten for attention. And there wasn’t much fall-out happening.
With elf Mineral Eyeshadow Golden, you have to wear a primer. I don’t experience any creasing with this shadow. However, it fades. Well, it does more than just fade. The times that I tried it without a primer, the shadow completely disappeared. I don’t know where it goes, but at the end of the day, it’s not on my lids anymore. The color goes, and the shimmer also goes. So make sure to prep your lids with primer or your hard work will vanish.
I also love how easily elf Golden applies. The shadow is finely milled, so application is superbly smooth. It goes on more like a soft, soft cream! Blending is also a breeze. Because the shadow is quite pigmented, the color doesn’t blend out as easily. So you don’t have to worry too much about over blending it.
Pros
|
Cons
|
Final : 9.7/10
If I run out of e.l.f. Golden Mineral Eyshadow, I will definitely purchase it again.
What’s your favorite or least favorite color from the elf Mineral Eyeshadow Collection? Please leave comments!








Comments: